In summary:
- Creating beautiful altar arrangements is not about memorizing rules, but understanding the professional principles of proportion, structure, and balance.
- Timeless design concepts like the Golden Ratio (the 1.5 rule) and the Fibonacci sequence (the 3-5-8 rule) are the secret to creating naturally harmonious shapes.
- Professional techniques like building a foliage “skeleton” first and using one-sided designs allow for more beautiful, stable, and budget-conscious results.
- Proper transport and handling are just as crucial as the design itself to ensure your work arrives perfectly at the altar.
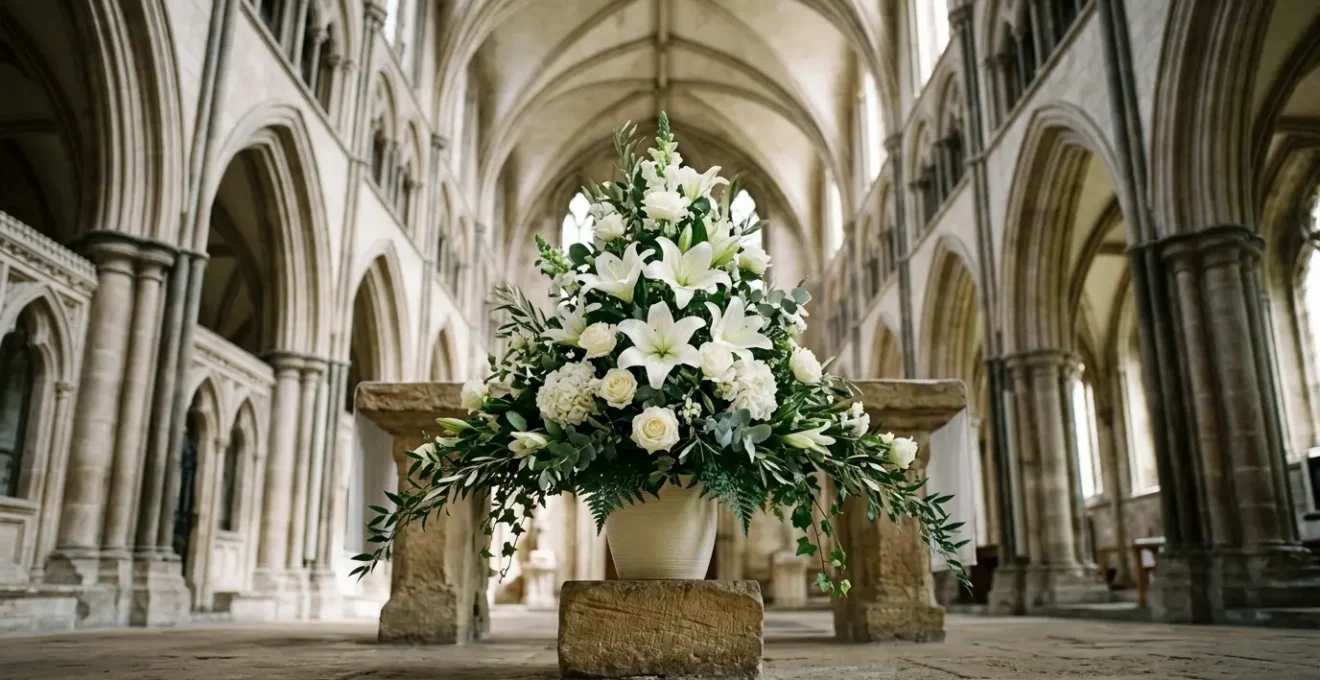
Stepping up to the altar to place the flowers you’ve arranged is a unique act of service. There is both an honor and a palpable pressure in creating a design that can hold its own in a large, sacred space and elevate the spirit of the congregation. For many church flower volunteers, the desire to create something beautiful is strong, but the path to getting there can feel confusing. You’ve heard the advice—use floral foam, make it tall, keep it even—but your arrangements still don’t have that professional, effortless grace you admire.
The challenge is that most advice consists of rigid rules without the underlying reasons. This leaves you feeling like you’re just following a recipe, and if something goes wrong, you don’t know how to fix it. What if one side droops? What if your best flowers are hidden? How do you even get a wide, delicate arrangement to the church in one piece? The secret used by professional florists isn’t a hidden set of rules; it’s a deep understanding of the principles behind them.
This guide is designed to move you from volunteer to confident floral artist. We will go beyond the “what” and dive into the “why.” You will learn to see your arrangements through the eyes of a designer, understanding the timeless principles of geometry, proportion, and visual weight. We will build a symmetrical triangle arrangement together, not by rote, but by mastering the foundational techniques that ensure a beautiful, stable, and harmonious result every time. This is how you transform a task into an art form.
This article provides a comprehensive walkthrough of the core principles and practical steps needed to master this classic design. The following sections break down everything from establishing correct proportions to ensuring your creation arrives safely at the altar.
Summary: A Step-by-Step Guide to Professional Altar Arrangements
- The 1.5 Rule: How Tall Should the Flowers Be Relative to the Vase?
- Skeleton First: How to Define the Shape with Foliage Before Flowering?
- Mirror Image: How to Ensure Both Sides Match Perfectly?
- One-Sided Design: How to Save Money on Flowers the Congregation Won’t See?
- Box and Wedge: How to Move a Wide Triangle in a Narrow Van?
- Symmetrical Triangle: The 3-5-8 Rule for Perfect Proportions
- The Line Flower: How to Use Lilies to Add Height to a Pedestal?
- Mastering Western Geometric Principles: The Foundation of Commercial Floristry
The 1.5 Rule: How Tall Should the Flowers Be Relative to the Vase?
One of the first questions any arranger asks is, “How tall should this be?” The most common answer is the “1.5 Rule,” a guideline stating that the height of your arrangement should be about 1.5 times the height of your vase. This isn’t an arbitrary number; it’s a practical simplification of a powerful artistic principle. This proportion prevents the arrangement from looking top-heavy or stunted, creating a sense of natural balance that is immediately pleasing to the eye.
For a standard altar vase that is 12 inches tall, your tallest flower or foliage should reach a height of approximately 18 inches above the vase rim, making the total height 30 inches. But the real magic is in understanding *why* this works. This ratio creates what designers call harmonious proportions. It ensures the vessel and the flowers appear as a single, cohesive unit rather than two separate objects. Experts confirm this ratio is deeply rooted in aesthetics that feel innate to us.
The 1.5 rule isn’t arbitrary but is a simplified version of the Golden Ratio (1:1.618), a proportion found throughout nature and art that the human eye finds inherently pleasing.
– Floral design experts, Sweet Earth Co. Golden Ratio Guide
While the 1.5 rule is a fantastic starting point, remember it’s a guide, not a law. For a very wide container, you might extend the proportion to 1.5 times the width. The key is to trust your eye. Use the rule to establish your initial height, then step back and see if the balance feels right for the space it will occupy on the altar.
Skeleton First: How to Define the Shape with Foliage Before Flowering?
The biggest mistake an amateur makes is trying to place the most beautiful, expensive flowers first. A professional, however, knows that a breathtaking arrangement depends on a hidden foundation. Before a single bloom is placed, you must first build the “skeleton” of your design using greenery. This framework defines the final shape—your symmetrical triangle—and provides the structural integrity to hold every subsequent stem exactly where you want it. This step is not about decoration; it’s about engineering.
Traditionally, this was the job of green floral foam. However, many professional and environmentally conscious florists now prefer a more sustainable and effective mechanic: chicken wire. A properly prepared ball of chicken wire provides a sturdy, reusable grid that grips stems securely. It also allows flowers to drink naturally, unlike foam which can sometimes have its water uptake blocked. Building this structure is a critical skill.
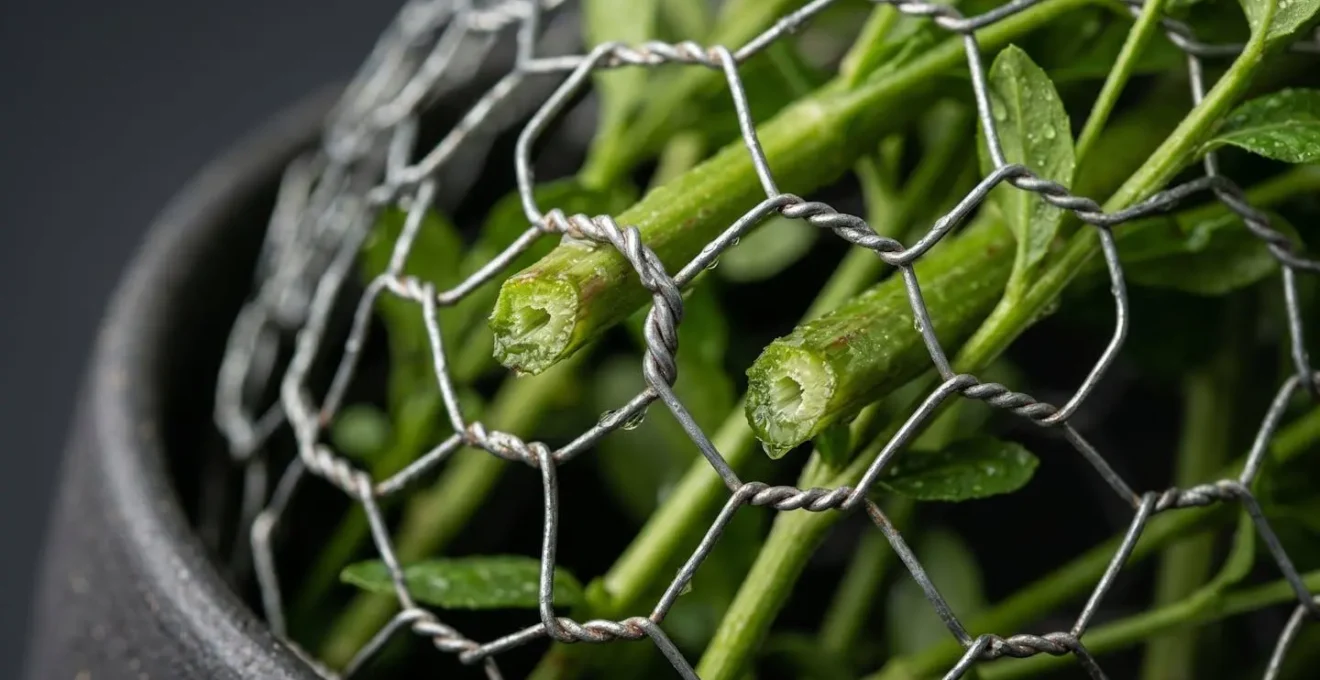
The image shows this technique in action: stems are inserted at angles, crossing over each other within the wire mesh to lock themselves in place. This creates a strong, self-supporting web. To achieve this, you can follow a simple process:
- Measure and cut a piece of chicken wire roughly double the height and width of your container.
- Gently crumple the wire into a loose ball or pillow shape and fit it inside your vessel. It should be snug.
- Use waterproof floral tape across the top of the container in a grid pattern to secure the wire, ensuring it won’t shift during transport.
- Begin inserting your sturdiest foliage to create the main triangular outline: one tall stem at the top center, and two wider, shorter stems at the bottom left and right. Your skeleton is now ready for flowers.
Mirror Image: How to Ensure Both Sides Match Perfectly?
The very definition of a symmetrical triangle is that one side is a mirror image of the other. It sounds simple, but achieving true, balanced symmetry is a common stumbling block. Your eyes can easily play tricks on you when you’re working up close. You might place a rose on the left, then a similar rose in the corresponding spot on the right, only to step back and find the whole arrangement feels lopsided. This is because symmetry is about more than matching flower for flower; it’s about balancing visual weight.
A dark, fully open peony, for example, has more visual weight than a light-colored, closed bud, even if they are the same size. To achieve balance, you must develop an “architect’s gaze“—the ability to see the overall shape and density rather than the individual flowers. Professionals use several tried-and-true tricks to force their brains to see the big picture and spot asymmetries instantly.
These techniques are not about complex tools but about changing your perspective. Adopting these habits is what separates a good arrangement from a great one:
- The Squint Test: This is the oldest trick in the artist’s book. Step back several feet from your arrangement and squint your eyes. The details will blur, forcing you to see only the overall shape, color masses, and any “holes” or heavy spots.
- The Mirror Check: View your arrangement through a mirror. The reversed image will make any imbalances or asymmetrical placements immediately jump out at you, as your brain sees it “fresh” without its preconceived notions.
- The Spin Method: If possible, work on a rotating stand or “turntable.” Constantly spinning the arrangement as you work forces you to build it in three dimensions and maintain balance from every angle, not just the front.
- Check Your Depth: Remember to angle flowers towards the viewer. A flower pointing straight up on the left side must be mirrored by one angled correctly on the right, not another one pointing straight up.
One-Sided Design: How to Save Money on Flowers the Congregation Won’t See?
An altar arrangement is, by its nature, viewed from the front. The back is typically placed against a wall, a reredos screen, or a curtain. This presents a significant opportunity for smart, professional design that is often missed by volunteers: the one-sided arrangement. This is not about making a “half-finished” design; it is a deliberate, professional technique to allocate your budget where it has the most impact, on the flowers that the congregation will actually see.
A true one-sided design has a flat, clean, and finished back composed of inexpensive foliage. The goal is to create the full, lush shape of the symmetrical triangle from the front, while using minimal materials at the rear. This allows you to pack the front and sides with your most beautiful and expensive “focal” flowers, creating a look of abundance and luxury without doubling your flower bill. The key is to make the back look intentional and tidy, not forgotten.
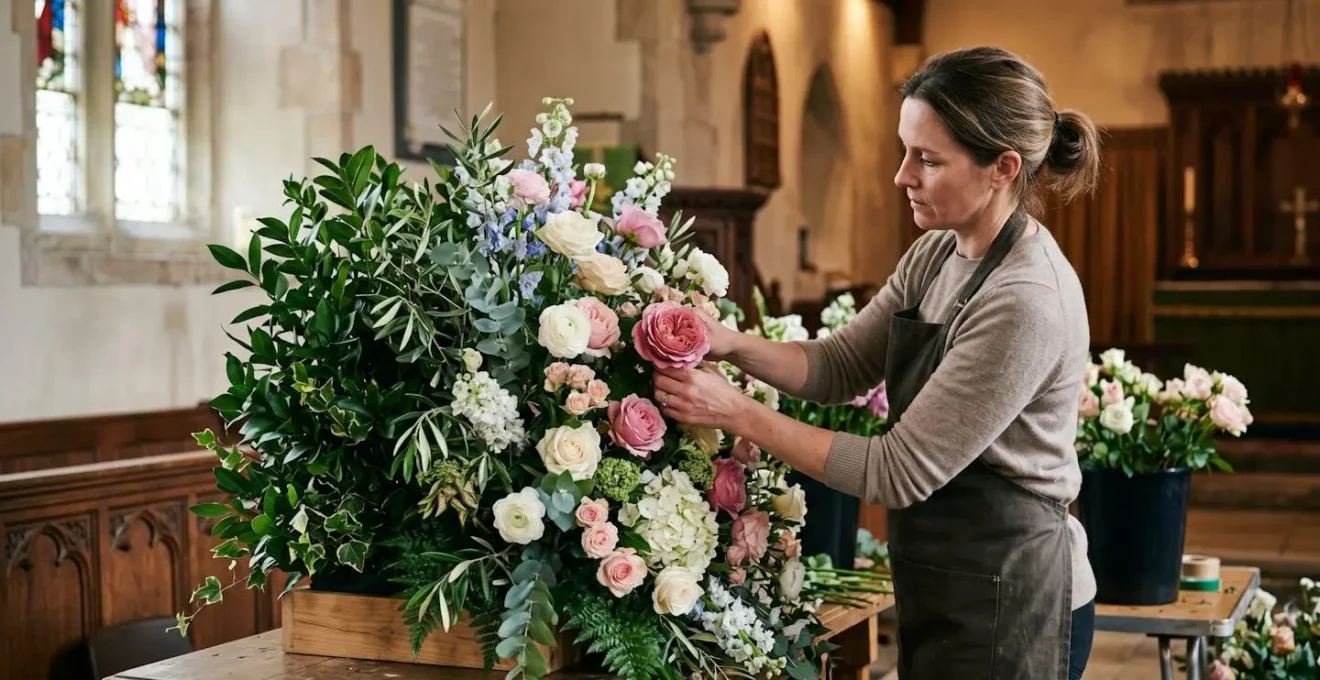
As you can see in the profile view, the florist has created a lush, dramatic front with premium flowers. The back, however, is a clean wall of structural greenery. This is not cheating; it is strategic. This approach also makes the arrangement lighter and easier to place flush against a surface. You are simply putting the value where it will be seen and appreciated. This principle of intentional design is a hallmark of professional floristry, allowing you to be a good steward of your church’s flower budget while still delivering a visually stunning result.
Box and Wedge: How to Move a Wide Triangle in a Narrow Van?
Your beautiful arrangement is complete. It is perfectly symmetrical, structurally sound, and ready for Sunday service. Now comes the most nerve-wracking part: getting it to the church. A wide symmetrical triangle is an awkward shape to transport, and a single sharp turn or bump can undo hours of work. Professionals have developed systems to ensure their creations arrive in pristine condition, and these techniques are essential for any church flower volunteer.
The most common method is the “box and wedge” system. The arrangement is placed in a sturdy cardboard box that is wide enough to accommodate the vase. Then, the surrounding space is filled with packing material—rolled-up towels, foam wedges, or even balled-up newspaper—to wedge the vase securely in place, preventing any tipping or sliding. For very large arrangements, using a seatbelt and bungee cords to secure the container to a car seat can be a lifesaver.
However, securing the vase is only half the battle. You must also protect the delicate flowers from physical damage and temperature shock. A sudden blast of heat from a car vent or direct sunlight can cause blooms to wilt in minutes. A simple plastic tent or bag loosely draped over the arrangement can help maintain humidity and protect it from drafts. For any extremely delicate, wispy elements, it’s often best to transport them separately in water tubes and add them on-site during the final five minutes of setup.
Your Action Plan: Climate-Controlled Transport Checklist
- Pre-cool the van or car before loading the arrangements to prevent sudden temperature shock to the flowers.
- Use plastic tenting for long journeys or on very dry, hot days to help maintain crucial humidity levels around the blooms.
- Avoid placing the boxed arrangement in direct sunlight at all costs, as this can quickly scorch leaves and petals.
- Transport delicate, wispy elements separately in individual water tubes and add them on-site in the final 5 minutes before the service.
- Secure large containers using the seatbelt method, supplemented with bungee cords for large-scale arrangements, to prevent tipping.
Symmetrical Triangle: The 3-5-8 Rule for Perfect Proportions
Once you’ve established the overall height and shape of your arrangement, the next step is to fill it with flowers in a way that feels balanced and natural, not just dotted with color. The “3-5-8 Rule” is a powerful guideline used by florists to achieve this. It’s a formula for grouping different types of flowers to create rhythm, depth, and visual harmony. Just like the 1.5 rule for height, this principle is rooted in a mathematical sequence found throughout the natural world.
The rule is based on the Fibonacci sequence, where each number is the sum of the two preceding ones. Arrangements that use these proportions feel inherently right to us because they mirror growth patterns we see everywhere, from seashells to pinecones. An expert at the Flower Thinking Design Institute notes that this connection is what makes the rule so effective, creating designs that feel naturally harmonious. This is the core of creating a design that feels “garden-fresh” and professionally composed.
Case Study: Applying 3-5-8 to Flower Groupings for Visual Harmony
To put the 3-5-8 formula into practice, professional florists will often group their flowers by type and function. For a standard altar arrangement, they might use 3 large focal flowers (like showy roses or lilies) as the main stars of the design. These are then supported by 5 structural greenery stems or secondary flowers (like eucalyptus or carnations) that build out the shape. Finally, they add 8 smaller filler flowers (such as baby’s breath or statice) to fill in gaps and add texture. A study on this method reveals that using these groupings, rather than placing single stems randomly, prevents the “polka dot” look common in amateur arrangements. Instead, it creates depth, balance, and a cohesive, natural appeal that guides the eye through the design.
By grouping flowers in these odd-numbered, Fibonacci-based clusters, you create a visual rhythm that is more dynamic and interesting than simple, even-numbered pairs. It’s a simple shift in thinking that can dramatically elevate the quality of your work from homemade to professionally styled.
The Line Flower: How to Use Lilies to Add Height to a Pedestal?
In a large church, height is everything. A pedestal or altar arrangement needs to have a strong vertical line to draw the eye upward and command attention from the back pews. This is the job of “line flowers”—flowers characterized by tall, elegant spires of blooms. While many flowers can serve this role, lilies are a classic and beloved choice for church settings, symbolizing purity and resurrection. Their large, trumpet-shaped blooms and significant height potential make them ideal for creating dramatic, formal designs.
However, lilies are not the only option, and choosing the right line flower depends on the “personality” you want the arrangement to convey. Gladiolus offers a bold, sword-like structure, while delphiniums provide a more romantic, cottage-garden feel with their dense spires of blue. A comparative analysis of line flowers shows the distinct character each brings to a design.
| Line Flower | Height Potential | Personality | Fragility | Color Range |
|---|---|---|---|---|
| Lilies | 3-6 feet | Formal, dramatic, spiritual | Moderate (pollen issue) | White, pink, orange, yellow |
| Gladiolus | 2-5 feet | Bold, sword-like, striking | Sturdy, strong stems | Almost any color |
| Snapdragon | 1-4 feet | Whimsical, vertical | Moderate | Wide range |
| Delphinium | Up to 6 feet | Dramatic, cottage garden | High (requires staking) | Blue, purple, white, pink |
| Liatris | 2-4 feet | Modern, textural | Low, very sturdy | Purple, white |
When working with lilies, there is one crucial professional step that cannot be skipped, especially in a church setting: removing the stamens. The anthers at the tip of the stamens are loaded with dark, powdery pollen that can permanently stain anything it touches—including white altar linens, the priest’s vestments, or a bride’s dress. This simple act of prevention is a mark of a thoughtful and professional florist.
- Wait until lily buds are just beginning to open but the stamens are still contained.
- Gently grasp the anther (the pollen-bearing tip) at the end of each stamen with your fingers or a small pair of tweezers.
- Pull firmly but smoothly to remove the entire stamen from the flower’s center.
- Dispose of the removed stamens carefully to avoid transferring pollen to fabrics or other surfaces. This is especially critical for weddings and formal settings.
Key takeaways
- Harmonious proportions are not random; they are often based on natural mathematical principles like the Golden Ratio (1.5x vase height) and Fibonacci sequence (3-5-8 rule).
- A strong arrangement is built like a house: create the structural “skeleton” with foliage first before adding the beautiful “decoration” of your focal flowers.
- Professional techniques like the “squint test” and creating intentional one-sided designs are secrets to achieving better balance while saving time and money.
Mastering Western Geometric Principles: The Foundation of Commercial Floristry
As we’ve explored the rules of height, proportion, and shape, it’s clear they form a cohesive system for creating visually pleasing arrangements. The symmetrical triangle is a cornerstone of this system, which is part of the broader tradition of Western geometric design. Understanding this context elevates your work from simply following steps to participating in a rich artistic history. These principles didn’t arise in a vacuum; they were developed and codified for very practical reasons.
The standardization of shapes like the triangle, circle, and fan in European and American floristry was about more than just aesthetics. As the floral industry grew, these repeatable shapes allowed for efficient training, predictable use of materials, and scalable pricing models. It was a fusion of art and commerce that formed the bedrock of modern commercial floristry. This approach focuses on creating a pleasing mass of color and form, where the whole is often more important than the individual parts.
Case Study: Western Mass Design vs. Eastern Ikebana Philosophy
To truly understand the Western approach, it’s helpful to contrast it with Eastern floral philosophy, such as Japanese Ikebana. A comparative analysis of design traditions highlights a fundamental difference in intent. Western design, including the symmetrical triangle, focuses on creating a pleasing, abundant mass, celebrating color, symmetry, and proportions derived from European art masters. The emphasis is on the overall silhouette and the harmonious blend of a large group of flowers. In contrast, Ikebana celebrates the purity of line, the importance of negative space, and the unique character of each individual stem. It is an art of minimalism and asymmetry, where three stems can be more powerful than three dozen. Both traditions create beauty, but they speak a different visual language and serve different cultural purposes.
By creating a symmetrical triangle for a church altar, you are working within a proud Western tradition that values harmony, balance, and abundance. You are using principles refined over centuries to create a powerful visual statement of celebration and reverence. Recognizing this heritage gives deeper meaning to every flower you place.
Now, equipped with these principles of proportion, structure, and technique, you are ready to approach the altar not just as a volunteer, but as a confident designer. Trust the rules, but more importantly, trust the artistic eye you have now begun to develop. Begin creating with renewed confidence for your next service.