Switching from scissors to a florist knife is the single most effective change you can make to extend flower vase life.
- Scissors inflict crushing cellular trauma on a stem’s vital water-conducting tissues (xylem), severely limiting hydration.
- A sharp knife creates a clean, open incision, preserving the vascular system and creating a clear pathway for maximum water uptake.
Recommendation: Master the simple ‘thumb guard’ technique for a safe, professional-grade cut every time, ensuring your flowers thrive.
As a budding florist, reaching for a pair of scissors feels natural, safe, and familiar. The sharp, open blade of a florist knife can seem intimidating, a tool reserved for seasoned professionals with years of experience. You might even think, « A cut is a cut, right? » This common assumption is the single biggest barrier to achieving truly long-lasting, vibrant arrangements. The convenience of scissors comes at a hidden cost: the health and longevity of your flowers.
The truth is, the superiority of a knife has little to do with tradition and everything to do with plant biology. While scissors provide a quick snip, they create a brutal, crushing injury at a microscopic level. This cellular trauma is the start of a rapid decline for the flower. The real secret to professional floristry isn’t just about arranging flowers beautifully; it’s about understanding how to care for them from the moment they are cut.
But what if the « dangerous » tool was actually the safest, both for you and the flowers? The key isn’t to avoid the knife but to master it. By shifting your perspective from fear of the tool to an understanding of its purpose, you can unlock the secret to healthier, more resilient bouquets. This guide will walk you through the science, debunk the myths, and teach you the one safe technique you need to use a florist knife with confidence.
This article will explore the critical differences between these tools, from the microscopic damage they cause to the proper techniques for safety and maintenance. By understanding the ‘why’ behind each step, you will see the florist knife not as a risk, but as an essential instrument of care.
Summary: Why a Florist Knife Is the Professional’s Choice for Flower Health
- Xylem and Phloem: Why Blunt Scissors Kill Flowers by Crushing Tubes?
- The Thumb Guard Technique: How to Cut Stems Without Slicing Your Thumb?
- Whetstone vs Steel: How to Keep Your Knife Razor Sharp for Clean Cuts?
- Botrytis Prevention: Why Dirty Knives Spread Disease in the Bucket?
- Daily Snip: Why Does the Stem End Seal Up After 24 Hours?
- The Air Embolism Myth: Do You Really Need to Re-cut Stems Underwater?
- Curved vs Straight Blade: Which Shape Is Best for Woody Stems?
- How to Protect Delicate Vascular Systems of Spring Flowers?
Xylem and Phloem: Why Blunt Scissors Kill Flowers by Crushing Tubes?
To understand why a knife is superior, you first need to see a flower stem not as a solid stick, but as a complex bundle of microscopic straws. These are the xylem and phloem, the plant’s vascular system. The xylem is responsible for pulling water up from the vase to the flower head, a critical process for hydration and vitality. When you use scissors, the two blades apply pressure from opposite sides, pinching and crushing this delicate network before the cut is complete. This action creates widespread cellular trauma, flattening the very tubes the flower needs to drink.
The damage is immediate and devastating. Imagine trying to drink through a straw that’s been smashed flat—very little liquid can get through. For a flower, this means a drastically reduced ability to absorb water, leading to premature wilting, drooping, and a short vase life. The Mississippi State University Extension Service puts it simply, noting that « Sharp knives make clean cuts and do not pinch water-conducting vessels the way scissors can. » The goal is to create a clean, open surface to maximize the hydration pathway. In contrast, a single-blade knife slices cleanly through the stem in one motion, leaving the xylem tubes perfectly open and ready to absorb water.
The consequences of this damage are quantifiable. While it may look clean to the naked eye, the internal destruction is severe. In fact, a 2025 study on xylem-phloem dysfunction showed that experimental xylem damage of around 56% was enough to reduce the entire plant’s water conductance, photosynthesis, and growth by a staggering 57%. By using scissors, you are essentially initiating a process of slow dehydration from the moment you make the cut.
The Thumb Guard Technique: How to Cut Stems Without Slicing Your Thumb?
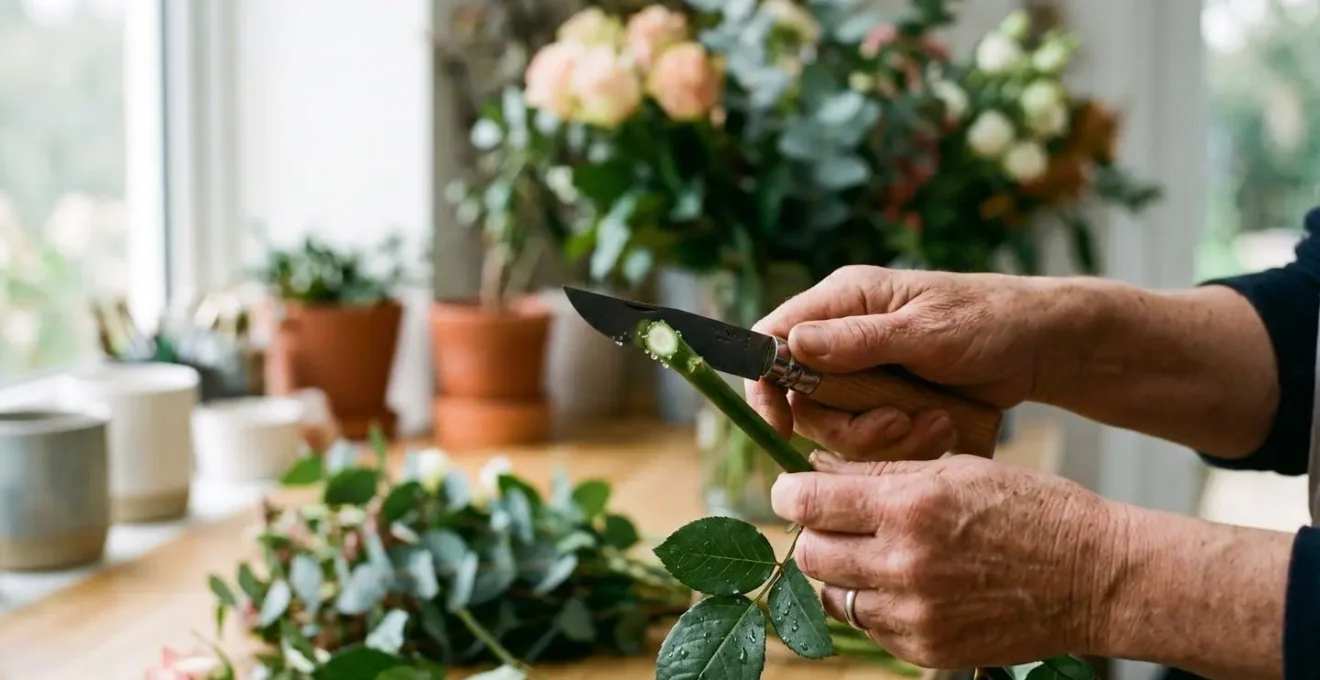
The primary barrier for most beginners is the fear of the blade. This is completely understandable. As one Professional Florist Educator notes, « Floral knives can be super intimidating! But by combining a sharpened tool with the right technique, you can very safely handle and use a floral knife day to day. » The key is not brute force but controlled, precise movement. The professional method, often called the « thumb guard » technique, is designed for safety and efficiency, keeping your fingers away from the blade at all times.
The technique involves holding the stem in your non-dominant hand and the knife in your dominant hand. Instead of pushing the blade *into* the stem, you place the blade against the stem and pull the stem *through* the blade, away from your body. Your thumb on your non-dominant hand acts as a guide and a brace, but it should always remain a safe distance from the blade’s path. It’s a pulling motion, not a chopping one. This method gives you complete control over the cut and ensures the blade is always moving away from you.
Your Action Plan: Safe Stem Cutting Protocol
- Prepare the Stem: Remove any foliage that will fall below the waterline in the vase. This is a critical first step to prevent bacterial growth.
- Position the Stem: Hold the flower stem in your non-dominant hand with your palm facing up (underhanded).
- Grip the Knife: Hold the floral knife low in your dominant hand, keeping your wrist and hand relatively rigid for control.
- Guard Your Thumb: Keep the thumb of your non-dominant hand parallel to the knife blade, ensuring it is at least one inch away from the cutting edge at all times.
- Execute the Cut: Draw the stem through the knife blade in a smooth, controlled pulling motion. Never bend the stem over the blade until it snaps; the cut should be a clean slice.
With just a little practice, this movement becomes second nature. It’s far safer than the unpredictable closing action of scissors and eliminates the risk of repetitive strain injury common with heavy clippers. By mastering this single, simple technique, you remove the fear and unlock the full potential of the florist knife.
Whetstone vs Steel: How to Keep Your Knife Razor Sharp for Clean Cuts?
A sharp knife is a safe knife. A dull blade requires more pressure to cut, increasing the risk of it slipping and causing injury. More importantly, a dull blade begins to mimic the damaging effects of scissors, tearing and crushing plant tissue instead of slicing it cleanly. Maintaining a razor-sharp edge is therefore non-negotiable. The two essential tools for this are the sharpening steel and the whetstone, and they serve very different purposes.
Think of the blade’s edge as a series of microscopic teeth. With use, these teeth can get bent and misaligned. A sharpening steel (or honing steel) does not remove metal; its purpose is to realign these microscopic teeth back into a straight cutting edge. This process is called honing. You should hone your knife frequently, even daily, before you start working. It’s a quick maintenance step that keeps a sharp edge performing at its peak.
Over time, through use and honing, the blade’s edge will wear down and become genuinely dull. This is when you need a whetstone. A whetstone is an abrasive block that works by grinding away a tiny amount of metal to create a brand new, sharp edge. This process is called sharpening. Unlike honing, sharpening is done less frequently—perhaps every few months for a professional florist. Using a whetstone correctly is a skill that takes practice, as you must maintain a consistent angle to create a uniform edge, but it is essential for the long-term health of your tool.
Botrytis Prevention: Why Dirty Knives Spread Disease in the Bucket?
Beyond the physical damage of the cut, there is an invisible threat that every florist must manage: pathogens. Your knife is a primary vector for spreading diseases from one stem to another, and the most common culprit in the floral world is Botrytis cinerea, also known as gray mold. This fungus is devastating to cut flowers, causing spotting on petals, rotting stems, and a rapid collapse of the entire bloom.
The scale of this threat is immense; research on ornamental production systems reveals that Botrytis infects over 1,400 species of cultivated plants and is one of the most notorious pathogens of ornamental cut flowers. Every time you cut an infected stem, your blade picks up microscopic spores. If you then use that same uncleaned blade to cut a healthy stem, you directly introduce the fungus into its fresh wound, giving it a perfect entry point into the flower’s vascular system.
Organic residue, sap, and water on your blade create a sticky film, or biofilm, that acts as a perfect breeding ground for bacteria and fungal spores. This is why professional florists are meticulous about tool hygiene. Your knife should be regularly cleaned with a disinfectant solution (such as a floral sanitizer or an alcohol wipe) throughout the day, especially when moving between different batches of flowers. A clean cut is not just about a sharp blade; it’s about a sterile one.
Daily Snip: Why Does the Stem End Seal Up After 24 Hours?
Have you ever noticed that flowers which were vibrant yesterday have started to wilt today, even in a full vase of water? This happens because a cut stem is a wound, and the plant immediately initiates a natural defense mechanism to heal itself. This process, known as the wound response, involves producing a waxy, waterproof substance called suberin. This suberin creates a seal over the cut surface to prevent moisture loss and block pathogens from entering.
While this is a brilliant survival strategy for a plant in the wild, it’s a major problem for a cut flower in a vase. The very barrier created to protect the plant also blocks the xylem from absorbing water. Within about 24 hours, this seal can become significant enough to impede hydration, essentially causing the flower to dehydrate in a vase full of water. This is why a daily snip is so crucial for extending vase life. Re-cutting the stem removes the sealed end and exposes fresh, open vascular tissue, restoring the flower’s ability to drink freely.
This problem is made worse by crushed tissue from scissor cuts. Damaged cells release their contents into the water, providing a rich food source for bacteria. This « bacterial soup » not only creates foul odors but also clogs the xylem tubes from the outside, further blocking water uptake. Research shows that vase water in arrangements made with scissor-cut stems becomes cloudy far faster than with knife-cut flowers. A clean, daily cut with a sharp knife is the best defense against this natural sealing process.
The Air Embolism Myth: Do You Really Need to Re-cut Stems Underwater?
A long-standing piece of floral advice is to always cut stems underwater to prevent an air embolism—an air bubble being sucked into the xylem, creating a blockage that stops water flow. The theory is sound: if a stem is cut in the air, a bubble can enter the vascular system in the brief moment before it’s placed in water. This has led many to the cumbersome practice of cutting flowers in a sink or bucket full of water.
However, while air embolisms are a real phenomenon, the need for underwater cutting is largely a myth for most flowers in a typical setting. The risk is highest when a stem has been left out of water for a prolonged period, allowing it to dry out significantly. But if you are working with fresh flowers and placing them into water immediately after cutting, the risk is minimal. As a Horticultural Specialist from the Brooklyn Botanic Garden states, « Custom-cutting the flower stem in open air and immediately placing it in the vase of water is usually fine. »
The key is speed and hydration. As research from the Brooklyn Botanic Garden confirms, flower stems left out of water, even for a short period, will begin to seal up. The real enemy is the delay between cutting and placing in water, not the air itself. For a beginner, the added complexity and reduced visibility of cutting underwater can actually increase the risk of an improper cut or injury. Focus on making a clean, swift cut with your knife and moving the flower directly into your prepared vase. Your time is better spent ensuring a sharp blade and clean water than fumbling with an underwater setup.
Curved vs Straight Blade: Which Shape Is Best for Woody Stems?
As you become more comfortable with a florist knife, you’ll notice they come in two primary shapes: straight and curved. While both are effective, the blade’s geometry can make certain tasks easier. A straight blade is a fantastic all-purpose tool, excellent for general-purpose cutting of soft-stemmed flowers like roses, tulips, and carnations. Its linear edge is intuitive and easy to control for clean, angled cuts.
A curved blade, often called a « hawkbill » or « pruning » knife, offers a distinct advantage when dealing with tougher, more fibrous material. The concave curve allows you to hook the blade around a woody stem (like lilac, forsythia, or quince) and use a pulling motion to slice through it. This provides better leverage and concentrates the cutting force, making it easier to achieve a clean cut on tough stems without needing excessive pressure. For a beginner, starting with a high-quality straight blade knife is perfectly sufficient for the vast majority of floral work.
Case Study: Efficiency and Ergonomics in a Professional Studio
A well-known New York City design studio mandates a knife-only workflow, arguing that every time clippers are used, time and precision are lost. Beyond the clean cut, professionals report that knives are more ergonomic for all-day use. The repetitive opening and closing motion of heavy clippers puts significant strain on the tendons and ligaments of the hand and wrist, which can contribute to chronic conditions similar to carpal tunnel syndrome. A knife, used with the proper technique, becomes an extension of the hand and reduces this harmful repetitive stress.
Ultimately, the choice comes down to personal preference and the type of material you work with most often. The most important factor remains the quality of the steel and the sharpness of the edge, not the shape of the blade itself.
Key Takeaways
- Scissors crush the stem’s xylem tubes, severely blocking water uptake and shortening vase life. A knife makes a clean slice that preserves this vital vascular system.
- Using the « thumb guard » technique—pulling the stem through a stationary blade—is a safe, controlled method that eliminates the fear of cutting yourself.
- A clean tool is critical. Dirty blades spread diseases like Botrytis, which can quickly ruin an entire arrangement. Clean your knife regularly.
How to Protect Delicate Vascular Systems of Spring Flowers?
Spring flowers like tulips, daffodils, and hyacinths have particularly delicate or unique stem structures that require special handling. Their soft, hollow, or sappy stems are highly susceptible to damage and require a refined approach to ensure they can hydrate properly. This is where all the principles of a clean cut, proper hygiene, and swift handling come together.
For all flowers, cutting the stem at a 45-degree angle is best practice. This increases the surface area of the exposed xylem, providing a larger area for water absorption compared to a flat cut. This is especially important for flowers with thicker stems. A fantastic professional tip involves water temperature. According to research on cut flower conditioning, professional florists often use lukewarm water (around 100-110°F or 37-43°C). The warmer water molecules move faster and can be absorbed more easily by the stem, helping to rehydrate flowers quickly. The main exception is for bulb flowers like tulips, which prefer cold water to keep their stems firm and prevent them from elongating too quickly.
Different spring flowers also have unique needs that must be addressed right after cutting:
- Hollow Stems (Daffodils, Delphiniums): These stems are fragile and can easily bend or break. Some florists recommend turning them upside down and filling the stem with water before plugging the end with a small piece of cotton, though simply letting them condition in a deep vase of water for several hours is often sufficient.
- Sappy Stems (Poppies, Euphorbia): These flowers bleed a milky latex sap when cut. This sap can seal the stem end and foul the vase water. To stop this, you must sear the cut end immediately by holding it over a flame for a few seconds or dipping it in boiling water for 15 seconds.
- Daffodil Toxicity: Daffodils release a sap that is toxic to other flowers, causing them to wilt prematurely. Always condition daffodils separately in their own vase for at least one hour before adding them to a mixed arrangement.
By applying these specific conditioning techniques, you give each flower the best possible start. It transforms the simple act of cutting a stem into a thoughtful process of care, ensuring your delicate spring blooms last as long as possible.
Now that you understand the science and the technique, the next step is to put this knowledge into practice. Apply these conditioning protocols to your very next bouquet and observe the difference in vitality and longevity for yourself.